Introduction
Starting a new project can be overwhelming, but having a comprehensive Project Start Up Checklist can make the process smoother and more manageable in project management fundamentals. This checklist will guide you through the essential steps, from defining your project scope to planning for ongoing maintenance, ensuring your project is set up for success. Whether you’re launching a new website, developing an app, or starting a business, following this checklist will help you cover all critical aspects and avoid common pitfalls.
You can also download a Free Project Startup Document Checklist here, for additional information.
Table of Contents
Define Project Objectives
Defining project objectives is a crucial step in setting the foundation for a successful project. Here are the detailed steps:
- Understand the Purpose
- Clearly understand why the project is being undertaken. Determine the core purpose and the problem it aims to solve.
- Consult Stakeholders
- Engage with key stakeholders to gather their input and expectations. This ensures the objectives align with stakeholder needs and priorities.
- Set Specific Goals
- Make your objectives specific and clear. Avoid vague statements; instead, outline what exactly needs to be achieved.
- Ensure Measurability
- Define how success will be measured. Use metrics or KPIs to track progress and determine when objectives are met.
- Align with Business Goals
- Ensure project objectives support broader business goals. This alignment helps in securing stakeholder buy-in and resources.
- Prioritize Objectives
- Rank objectives based on their importance and impact. Focus on high-priority objectives that drive the most value.
- Document Objectives
- Write down the objectives in a project charter or plan. This documentation serves as a reference point for the entire project team.
- Communicate Objectives
- Share the defined objectives with the project team and stakeholders. Ensure everyone understands and is aligned with the objectives.
- Review and Adjust
- Regularly review objectives throughout the project lifecycle. Adjust them as necessary to respond to new insights or changes in scope.
Identify Key Stakeholders During Project Start Up

Identifying key stakeholders is essential for ensuring project success. Here’s a detailed guide on how to do it:
- Understand Stakeholder Types
- Stakeholders can be internal (e.g., team members, managers) or external (e.g., clients, suppliers). Recognize the different types to cover all bases.
- List Potential Stakeholders
- Create a comprehensive list of individuals or groups who might be affected by the project or have an interest in its outcome.
- Analyze Stakeholder Influence and Interest
- Assess each stakeholder’s level of influence and interest in the project. This helps prioritize their needs and expectations.
- Engage with Stakeholders
- Conduct interviews or surveys to gather input from potential stakeholders. Understand their expectations, concerns, and how they define project success.
- Map Stakeholders
- Use a stakeholder mapping tool to visualize the influence and interest of each stakeholder. This helps in strategizing how to manage their involvement.
- Prioritize Key Stakeholders
- Identify which stakeholders have the most impact on the project’s success. Focus on those with high influence and interest.
- Document Stakeholder Information
- Create a stakeholder register that includes contact information, roles, influence, and interest levels. This serves as a reference throughout the project.
- Communicate Regularly
- Establish regular communication channels with key stakeholders. Keep them informed and engaged to ensure their needs are met.
- Address Stakeholder Concerns
- Actively listen to stakeholder concerns and address them promptly. This builds trust and ensures smoother project execution.
- Review and Update Stakeholder List
- Regularly review and update the stakeholder list as the project progresses. Ensure new stakeholders are identified and managed accordingly.
Determine Project Deliverables

Determining project deliverables is crucial for defining what needs to be achieved. Here’s a detailed guide on how to do it:
- Identify Project Scope
- Clearly define the boundaries of the project. Understand what is included and what is not to avoid scope creep.
- Consult Stakeholders
- Engage with stakeholders to gather their requirements and expectations. Ensure their needs are reflected in the deliverables.
- Break Down the Project
- Divide the project into smaller, manageable tasks and phases. This makes it easier to identify specific deliverables for each part.
- Create a Deliverables List
- List all the items, services, or results that must be produced. Ensure each deliverable is specific and measurable.
- Define Acceptance Criteria
- Establish clear criteria for what constitutes a completed deliverable. This helps in ensuring quality and meeting stakeholder expectations.
- Assign Responsibilities
- Determine who is responsible for each deliverable. Assign tasks to team members with the right skills and expertise.
- Set Deadlines
- Establish timelines for each deliverable. Ensure they are realistic and align with the overall project schedule.
- Document Deliverables
- Create a deliverables document that outlines each item, its acceptance criteria, responsible parties, and deadlines. This serves as a reference throughout the project.
- Communicate Deliverables
- Share the deliverables list with the project team and stakeholders. Ensure everyone understands what needs to be achieved and by when.
- Monitor Progress During Project Start Up
- Regularly track the progress of each deliverable. Use project management tools to update the status and address any issues promptly.
- Review and Adjust
- Periodically review the deliverables list and make adjustments as needed. Ensure any changes are communicated and documented.
Create a Project Outline

Creating a project outline is essential for organizing and planning your project effectively. Here’s a detailed guide on how to do it:
- Define Project Scope During Project Start Up
- Clearly outline what the project will cover. Include the main objectives, deliverables, and boundaries.
- List Key Phases
- Break down the project into major phases or stages. This helps in organizing tasks and setting milestones.
- Identify Major Tasks
- List the main tasks required for each phase. Ensure they are specific and actionable.
- Set Milestones During Project Start Up
- Establish key milestones to track progress. These are significant points in the project timeline that indicate the completion of major phases or tasks.
- Assign Responsibilities
- Determine who will be responsible for each task and phase. Assign roles based on team members’ skills and expertise.
- Estimate Timeframes
- Provide estimated timeframes for each task and phase. Ensure they are realistic and achievable.
- Include Dependencies
- Identify tasks that depend on the completion of others. This helps in planning the sequence of activities.
- Outline Resources Needed
- List the resources required for each task and phase. This includes personnel, tools, and materials.
- Create a Visual Representation
- Develop a visual representation of the project outline, such as a Gantt chart or timeline. This aids in visualizing the project flow and dependencies.
- Document the Outline
- Write down the project outline in a document. Include all the details, such as scope, phases, tasks, milestones, responsibilities, timeframes, dependencies, and resources.
- Review with Stakeholders During Project Start Up
- Share the project outline with stakeholders for feedback. Ensure it aligns with their expectations and requirements.
- Adjust as Necessary
- Make adjustments based on stakeholder feedback. Ensure the outline remains flexible to accommodate changes during the project.
Set Measurable Goals
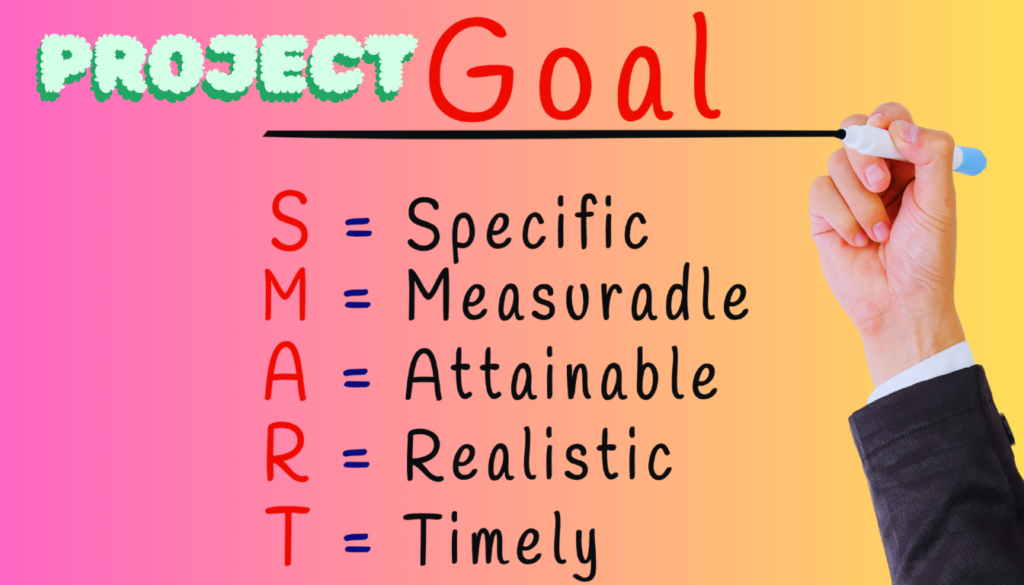
Setting measurable goals is crucial for tracking progress and ensuring project success. Here’s a detailed guide on how to do it:
- Define Clear Objectives
- Start with a clear understanding of what you want to achieve. Ensure your objectives are specific and unambiguous.
- Use the SMART Criteria
- Make your goals SMART: Specific, Measurable, Achievable, Relevant, and Time-bound. This framework helps in creating well-defined goals.
- Identify Key Metrics During Project Start Up
- Determine the key performance indicators (KPIs) or metrics that will be used to measure progress. Ensure these metrics are quantifiable.
- Set Baselines
- Establish baseline measurements for your metrics. This provides a starting point against which progress can be measured.
- Define Milestones During Project Start Up
- Break down your goals into smaller, manageable milestones. This helps in tracking progress and maintaining motivation.
- Assign Responsibilities
- Assign specific tasks and responsibilities to team members. Ensure everyone knows what they need to do to achieve the goals.
- Establish Timeframes
- Set deadlines for each goal and milestone. Ensure the timeframes are realistic and achievable.
- Document Goals
- Write down your goals and share them with the team. This ensures everyone is aligned and aware of the objectives.
- Monitor Progress
- Regularly track and monitor progress against the set metrics. Use project management tools to update the status and identify any issues.
- Adjust as Necessary
- Be flexible and adjust goals as needed. Ensure any changes are communicated and documented.
- Review and Reflect During Project Start Up
- At the end of the project, review the goals and reflect on what was achieved. Use this information to improve future goal-setting processes.
Assemble Project Team

Assembling a project team is crucial for project success. Here’s a detailed guide on how to do it:
- Define Roles and Responsibilities
- Clearly outline the roles required for the project. Define the responsibilities for each role to ensure there is no overlap or confusion.
- Identify Required Skills
- Determine the skills and expertise needed for each role. Ensure you have a mix of technical and soft skills within the team.
- Select Team Members During Project Start Up
- Choose team members based on their skills, experience, and suitability for the project. Consider their past performance and ability to work collaboratively.
- Conduct Interviews
- Interview potential team members to assess their fit for the project. Evaluate both their technical abilities and soft skills, such as communication and teamwork.
- Assign Roles During Project Start Up
- Assign specific roles to each team member based on their strengths and expertise. Ensure everyone understands their responsibilities and what is expected of them.
- Create a Trial Run
- Consider giving new team members a trial run with a small project or task. This helps in assessing their skills and fit within the team.
- Develop a Team Structure
- Establish a clear team structure with defined reporting lines. This helps in ensuring efficient communication and decision-making.
- Ensure Regular Communication During Project Start Up
- Set up regular communication channels and meetings. Use tools like Slack, Zoom, or project management software to keep everyone informed and engaged.
- Foster Collaboration
- Encourage collaboration and teamwork. Create an environment where team members can share ideas and support each other.
- Provide Training and Resources
- Offer any necessary training or resources to help team members succeed in their roles. This could include access to tools, software, or additional learning materials.
- Monitor Team Performance
- Regularly assess the performance of the team. Provide feedback and make adjustments as needed to ensure the team remains effective and motivated.
- Document Everything During Project Start Up
- Keep documentation of roles, responsibilities, and processes. This ensures clarity and can be used as a reference throughout the project.
Assign Roles and Responsibilities

Assigning roles and responsibilities ensures clarity and efficiency in project execution. Here’s a detailed guide on how to do it:
- Identify Project Needs
- Determine the specific needs of the project. Identify the tasks and activities that need to be completed.
- Define Roles
- Create clear and distinct roles based on the project needs. Common roles might include Project Manager, Developer, Designer, Content Creator, and Quality Assurance.
- Outline Responsibilities
- For each role, outline the specific responsibilities. Ensure these are detailed and cover all aspects of the role.
- Assess Team Skills
- Evaluate the skills and expertise of your team members. Match their skills to the roles you have defined.
- Assign Roles
- Assign roles to team members based on their skills and experience. Ensure each team member understands their role and responsibilities.
- Create Role Descriptions
- Document the role descriptions and responsibilities. Share these with the team to ensure clarity and alignment.
- Set Expectations
- Clearly communicate what is expected from each role. Include performance metrics and deadlines.
- Establish Reporting Lines
- Define the reporting structure. Ensure everyone knows who they report to and who they collaborate with.
- Provide Resources
- Ensure team members have the resources they need to fulfill their roles. This includes access to tools, information, and support.
- Monitor and Adjust
- Regularly monitor the performance of each role. Provide feedback and make adjustments as necessary to ensure the team remains effective.
- Encourage Collaboration During Project Start Up
- Promote collaboration between different roles. Ensure team members work together towards common goals.
Establish Communication Channels

Establishing effective communication channels is vital for seamless collaboration and project success. Here’s a detailed guide on how to do it:
- Identify Communication Needs
- Determine the communication needs of your project. Identify the types of information that need to be shared and the frequency of communication.
- Select Communication Tools
- Choose appropriate communication tools based on your needs. Common tools include email, Slack, Microsoft Teams, Zoom, and project management software like Trello or Asana.
- Set Up Channels
- Create specific channels for different types of communication. For example, you might have separate channels for general updates, project-specific discussions, and urgent issues.
- Define Communication Protocols
- Establish protocols for how and when communication should take place. Define guidelines for email usage, meeting schedules, and the use of instant messaging.
- Ensure Accessibility
- Make sure all team members have access to the chosen communication tools. Provide necessary training if required.
- Schedule Regular Meetings
- Schedule regular meetings to keep everyone updated. This could include daily stand-ups, weekly progress meetings, and monthly reviews.
- Encourage Open Communication
- Foster an environment where team members feel comfortable sharing ideas, feedback, and concerns. Encourage active participation and collaboration.
- Document Everything
- Keep records of all important communications. Use project management tools to document decisions, tasks, and progress.
- Monitor and Adjust
- Regularly review the effectiveness of your communication channels. Make adjustments as needed to improve clarity and efficiency.
- Provide Feedback
- Encourage feedback from team members about the communication process. Use this feedback to make continuous improvements.
Develop a Project Budget

Developing a project budget is essential for managing costs and ensuring financial control. Here’s a detailed guide on how to do it:
- Define Project Scope
- Outline the project scope clearly. List all the tasks, activities, and deliverables required to complete the project.
- Identify Cost Elements
- Identify all cost elements, including labor, materials, software, equipment, and any other resources. Ensure nothing is overlooked.
- Gather Cost Estimates
- Obtain cost estimates for each element. This might involve requesting quotes from vendors, estimating labor costs, and researching market prices.
- Create an Itemized Budget
- Develop an itemized budget that lists each cost element and its associated cost. This helps in understanding where the money will be spent.
- Include Contingency Funds
- Allocate a contingency fund to cover unexpected expenses. Typically, this is around 5-10% of the total budget.
- Set a Timeline
- Establish a timeline for the project. Determine when costs will be incurred and ensure the budget aligns with the project schedule.
- Assign Budget Responsibilities
- Assign budget management responsibilities to specific team members. Ensure they are accountable for tracking and reporting expenses.
- Use Budgeting Tools
- Utilize budgeting tools or software to create and manage the budget. Tools like Microsoft Excel, Google Sheets, or specialized project management software can be helpful.
- Monitor and Control Costs
- Regularly monitor actual spending against the budget. Use project management tools to track expenses and ensure they stay within the budget.
- Adjust as Needed
- Be prepared to adjust the budget as the project progresses. Reallocate funds if necessary to cover any changes in scope or unexpected costs.
- Review and Report
- Periodically review the budget and report on its status. Ensure stakeholders are kept informed about the financial health of the project.
Estimate Costs for Resources and Tools
Estimating costs for resources and tools involves several steps to ensure you cover all necessary expenses. Here’s a detailed guide:
- List Required Resources and Tools
- Identify all the resources and tools needed for the project, including software, plugins, themes, hosting, and any physical equipment.
- Research Costs
- Software and Plugins: Look up the prices for software licenses and plugins. For example, premium WordPress plugins and themes can range from $20 to $100+ each.
- Hosting: Determine the cost of web hosting. Basic hosting plans can start at around $3 to $10 per month, while more advanced plans can cost $30 and above.
- Domain Name: Check the cost of a domain name. Typically, domain names cost around $10 to $20 per year.
- Maintenance Services: If you plan to use maintenance services, consider their costs. Basic plans might start at $39/month, while more comprehensive plans can be $99/month or more.
- Request Quotes
- For custom services or equipment, request quotes from vendors. This is important for getting accurate cost estimates for items like custom development or specialized hardware.
- Estimate Labor Costs
- Calculate the cost of labor by estimating the number of hours required and multiplying by the hourly rates of your team members. For instance, if a developer charges $50/hour and the project requires 100 hours, the labor cost would be $5,000.
- Include Recurring Costs
- Don’t forget to include recurring costs such as monthly subscriptions for tools, hosting, and maintenance services. For example, if your hosting plan costs $10/month and your maintenance service is $39/month, the recurring cost would be $49/month.
- Create an Itemized List
- Develop an itemized list of all costs. This helps in understanding where the money will be spent and ensures nothing is overlooked.
- Add Contingency Funds
- Allocate a contingency fund to cover unexpected expenses. Typically, this is around 5-10% of the total estimated cost.
Create a Timeline and Set Milestones
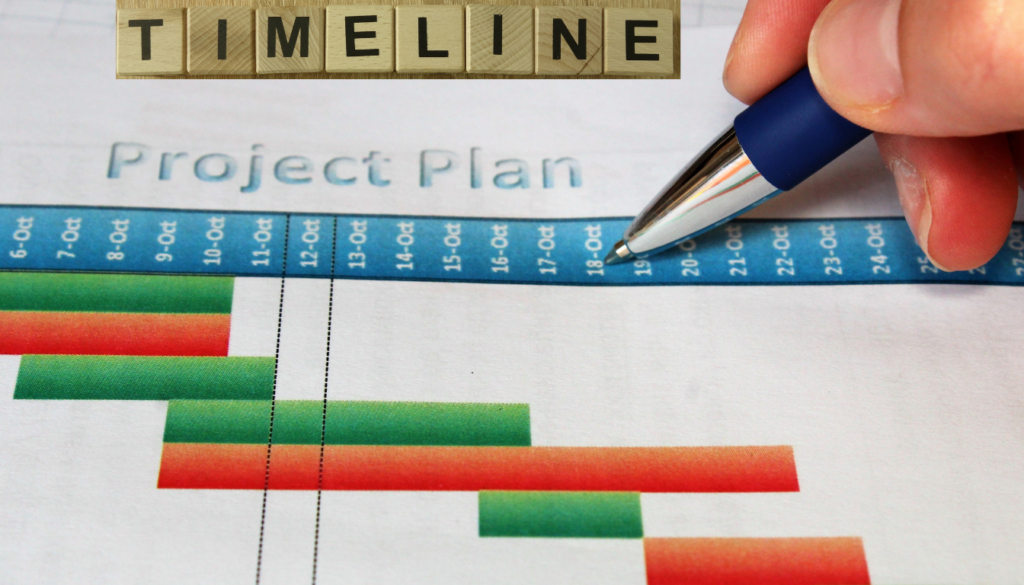
Creating a timeline and setting milestones is crucial for managing project progress and ensuring timely completion. Here’s a detailed guide:
- Define Project Phases
- Break down the project into distinct phases such as planning, design, development, testing, and deployment.
- Identify Key Milestones
- Determine key milestones for each phase. Milestones are significant points in the project timeline that mark the completion of major tasks or deliverables.
- Estimate Time for Each Task
- Estimate the time required for each task within the phases. Be realistic and consider potential delays or obstacles.
- Create a Timeline
- Develop a timeline that maps out the start and end dates for each phase and task. Use project management tools like Gantt charts to visualize the timeline.
- Set Deadlines
- Assign specific deadlines for each milestone. Ensure these deadlines are achievable and allow some buffer time for unexpected delays.
- Prioritize Tasks
- Rank tasks based on their priority level: low, medium, high, and critical. This helps in focusing on the most important tasks first.
- Assign Responsibilities
- Assign tasks to team members and ensure they are aware of their responsibilities and deadlines. Use project management tools to keep track of assignments.
- Monitor Progress
- Regularly monitor the progress of tasks and milestones. Use visual boards and tables to track changes, progress, and bottlenecks.
- Adjust as Needed
- Be flexible and adjust the timeline and milestones as needed. If a task is taking longer than expected, update the timeline accordingly.
- Communicate Updates
- Keep the team informed about project updates, missed deadlines, and new tasks through email notifications or a discussion panel.
Develop a Gantt Chart
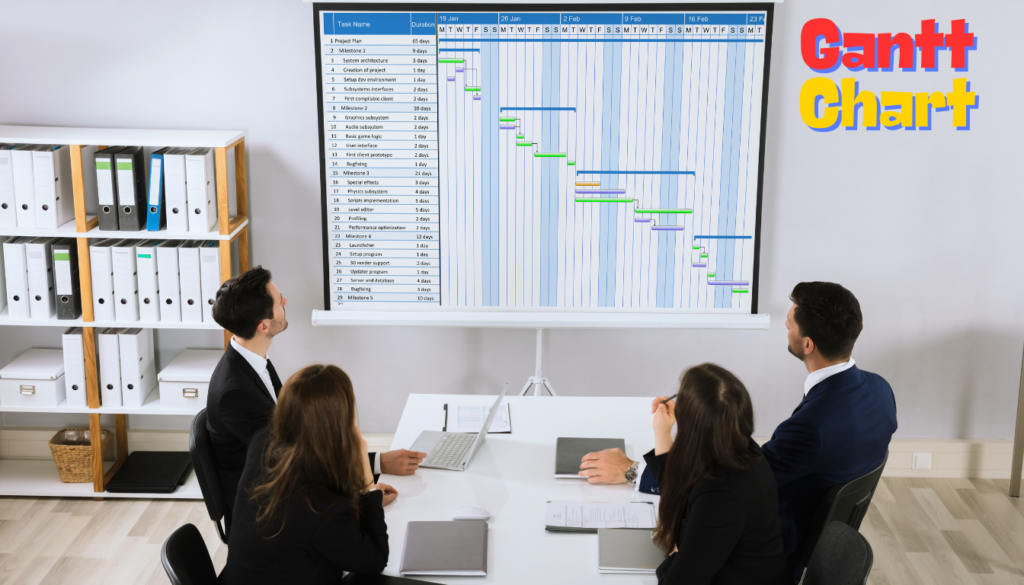
A Gantt chart is a powerful tool for visualizing project timelines and tracking progress. Here’s how to develop a Gantt chart:
- List Project Tasks
- Identify all tasks involved in the project. Break down larger tasks into smaller, manageable activities.
- Define Task Duration
- Estimate the start and end dates for each task. Determine how long each task will take to complete.
- Identify Dependencies
- Determine which tasks depend on the completion of others. This helps in sequencing tasks correctly.
- Choose a Gantt Chart Tool
- Use a project management plugin like WP Project Manager which offers a Gantt chart feature. Alternatively, tools like Microsoft Project or online Gantt chart software can be used.
- Create the Gantt Chart
- Input the tasks, durations, and dependencies into the Gantt chart tool. Most tools offer a drag-and-drop interface for easy management.
- Visualize the Timeline
- The Gantt chart will display tasks as horizontal bars across a timeline. Each bar represents the duration of a task, and dependencies are shown with connecting lines.
- Adjust and Update
- Regularly update the Gantt chart with progress and any changes in the schedule. Adjust tasks and timelines as needed to reflect the current project status.
- Monitor Progress
- Use the Gantt chart to monitor the progress of tasks and ensure the project is on track. The visual representation helps in quickly identifying any delays or bottlenecks.
Identify Potential Risks
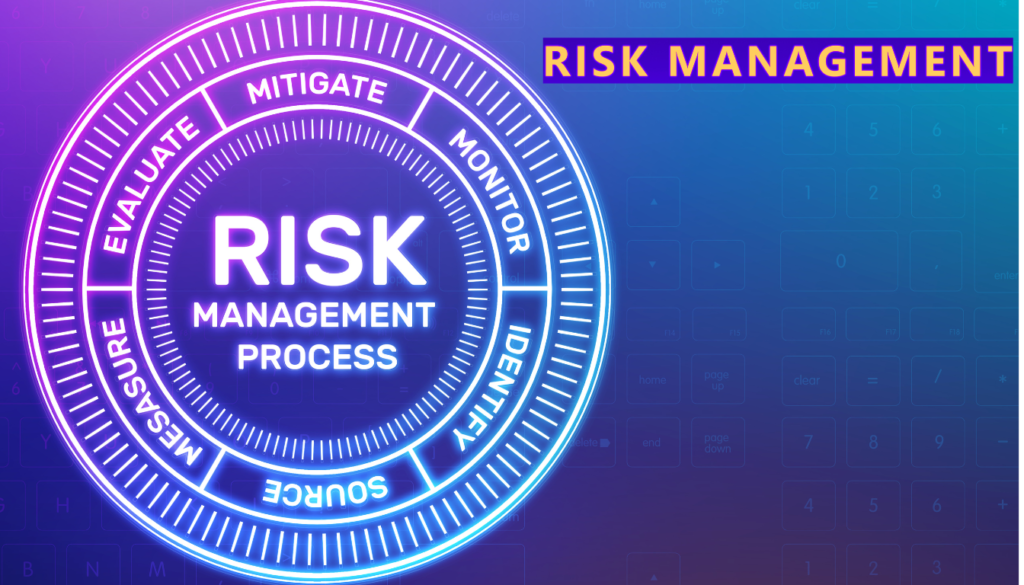
Identifying potential risks is crucial for mitigating issues that could impact your project. Here’s a detailed guide:
- Conduct a Risk Assessment
- Brainstorm with the Team: Gather your team to brainstorm potential risks. Consider all aspects of the project, including technical, financial, and operational factors.
- Use Past Experiences: Reflect on past projects to identify common risks and issues that occurred.
- Categorize Risks
- Technical Risks: These include software bugs, compatibility issues, and hardware failures.
- Financial Risks: Budget overruns, unexpected costs, and funding shortages.
- Operational Risks: Delays in project timelines, resource availability, and team performance.
- External Risks: Market changes, regulatory changes, and supplier issues.
- Evaluate the Impact and Likelihood
- Impact: Assess the potential impact of each risk on the project. Determine whether the impact would be low, medium, or high.
- Likelihood: Estimate the likelihood of each risk occurring. Categorize them as unlikely, possible, or likely.
- Develop Mitigation Strategies
- Preventive Actions: Identify actions that can be taken to prevent risks from occurring. For example, conducting thorough testing to avoid technical issues.
- Contingency Plans: Develop contingency plans for risks that cannot be prevented. This includes having backup resources or alternative plans.
- Monitor and Review
- Regular Reviews: Regularly review and update the risk assessment throughout the project lifecycle. This ensures new risks are identified and managed promptly.
- Track Progress: Use project management tools to track the status of identified risks and the effectiveness of mitigation strategies.
- Communicate Risks
- Inform Stakeholders: Keep all stakeholders informed about potential risks and the measures being taken to manage them.
- Documentation: Document all identified risks, their impact, likelihood, and mitigation strategies. This creates a reference for the team and stakeholders.
Create Risk Mitigation Strategies
Creating effective risk mitigation strategies is essential for minimizing the impact of potential risks on your project. Here’s a detailed guide:
- Identify and Prioritize Risks
- List Risks: Start by listing all identified risks. Categorize them based on their impact and likelihood.
- Prioritize: Focus on high-impact and high-likelihood risks first. These are the risks that could significantly affect your project.
- Develop Preventive Measures
- Technical Measures: Use tools and plugins like WP Staging to create a staging environment for testing changes before they go live. This helps in identifying and resolving issues early.
- Training and Education: Ensure team members are well-trained and aware of potential risks. Conduct regular training sessions to keep everyone updated on best practices.
- Create Contingency Plans
- Backup Plans: Document detailed restoration processes for recovering the WordPress site, including accessing backup files and verifying file integrity. Use secure password managers to share relevant login credentials.
- Alternative Solutions: Develop alternative plans for critical tasks. For example, have backup resources or vendors in case primary ones fail.
- Implement Monitoring Systems
- Regular Reviews: Conduct regular reviews and updates of the risk assessment throughout the project lifecycle. This ensures new risks are identified and managed promptly.
- Automated Monitoring: Use automated tools to monitor the site for issues like security vulnerabilities and performance bottlenecks.
- Communicate and Document
- Inform Stakeholders: Keep all stakeholders informed about potential risks and the measures being taken to manage them.
- Documentation: Create a detailed, step-by-step guide on the risk mitigation strategies. This should include preventive measures, contingency plans, and backup procedures. Update the document periodically as strategies or environments change.
- Test and Update Strategies
- Simulate Scenarios: Conduct simulations or drills to test the effectiveness of your risk mitigation strategies. This helps in identifying any gaps or areas for improvement.
- Continuous Improvement: Regularly update and refine your strategies based on feedback and new information.
Set Up Project Management Tools
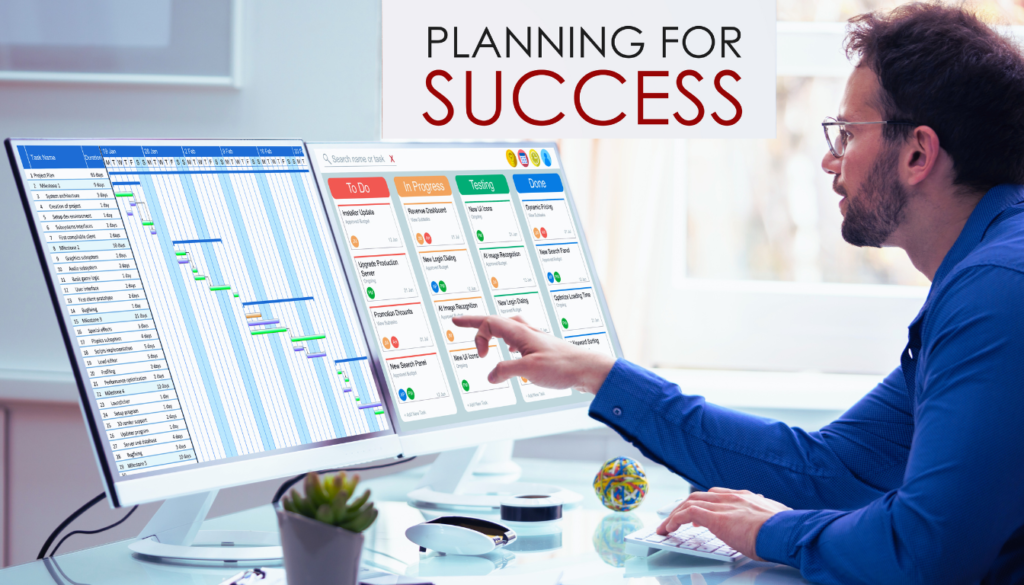
Setting up project management tools can streamline your workflow and enhance team collaboration. Here’s a detailed guide:
- Choose the Right Tool
- WP Project Manager: A WordPress plugin that provides a visual overview of your project’s progress through Gantt charts and a drag-and-drop editor.
- Zephyr Project Management: Allows file and link sharing, discussion panels, and visual progress tracking.
- monday.com: Offers 200+ workflow templates, customizable features, and integration with Excel or Google Drive.
- Install and Configure the Plugin
- Install the Plugin: Go to your WordPress admin dashboard, navigate to Plugins > Add New, and search for the desired project management plugin. Click “Install” and then “Activate.”
- Configure Settings: Access the plugin settings to configure email notifications, user roles, and other preferences. Ensure that team members are added and assigned appropriate roles.
- Create and Manage Projects
- New Project Setup: Create new projects by entering details such as name, category, and description. Rank projects based on their priority level: low, medium, high, and critical.
- Task Management: Break down projects into tasks and subtasks. Assign tasks to team members and set deadlines. Use the drag-and-drop feature to adjust tasks as needed.
- Utilize Visual Tools
- Gantt Charts: Use Gantt charts to visualize project timelines and dependencies. This helps in tracking progress and identifying bottlenecks.
- Boards and Tables: Track progress, targets, and milestones through visual boards and tables. This provides a clear overview of the entire workflow.
- Facilitate Communication
- Discussion Panels: Use the discussion panel to keep all messages in one tab, resulting in better management and uncluttered email inboxes.
- File Sharing: Share files and links to keep team members updated on new information about the project.
- Monitor and Adjust
- Regular Updates: Keep the project management tool updated with the latest progress and changes. Regularly review and adjust tasks and timelines as needed.
- Feedback Loop: Encourage team members to provide feedback on the tool’s usage and make necessary adjustments to improve efficiency.
Document Project Plan

Documenting a project plan is essential for ensuring clarity and alignment among all stakeholders. Here’s a detailed guide:
- Define Project Scope
- Outline the Project: Start by creating an outline that includes the project’s objectives, deliverables, and key milestones. List specific features and functionalities required, such as eCommerce capabilities or multi-author blog support.
- Inspiration and Benchmarking: Look at similar projects or websites for inspiration. This helps in defining the scope and setting realistic expectations.
- Create Detailed Project Documentation
- Project Overview: Provide a brief overview of the project, including its purpose, goals, and key stakeholders.
- Objectives and Goals: Clearly state the primary objectives and goals of the project. This sets a clear direction and helps in measuring success.
- Deliverables: List all deliverables, including their descriptions and due dates. This ensures everyone knows what is expected and when.
- Develop a Project Timeline
- Milestones and Deadlines: Break down the project into key milestones and set deadlines for each. This helps in tracking progress and ensuring timely completion.
- Task Breakdown: Divide the project into smaller tasks and assign them to team members. Specify start and end dates for each task.
- Resource Allocation
- Team Roles and Responsibilities: Document the roles and responsibilities of each team member. This ensures everyone knows their duties and who to contact for specific tasks.
- Resource Requirements: List the resources required for the project, such as tools, software, and budget. This helps in planning and avoiding resource shortages.
- Risk Management Plan
- Identify Risks: List potential risks that could impact the project. Categorize them based on their impact and likelihood.
- Mitigation Strategies: Document strategies for mitigating identified risks. Include preventive measures and contingency plans.
- Communication Plan
- Stakeholder Communication: Define how and when stakeholders will be informed about project progress. This includes regular updates, meetings, and reports.
- Documentation and Storage: Specify where project documents will be stored and how they will be accessed. Use tools like Google Drive or project management software for easy sharing and collaboration.
- Review and Approval
- Review Process: Establish a review process for the project plan. This includes getting feedback from key stakeholders and making necessary revisions.
- Approval: Obtain formal approval from stakeholders before proceeding. This ensures everyone is aligned and committed to the project plan.
Create a Written Contract
Creating a written contract is crucial for formalizing agreements and protecting the interests of all parties involved. Here’s a detailed guide:
- Define the Scope of Work
- Project Description: Clearly describe the project, including objectives, deliverables, and timelines. Be specific about what is included and what is not.
- Responsibilities: Outline the responsibilities of each party. This includes tasks, deadlines, and any specific requirements.
- Payment Terms
- Payment Schedule: Specify the payment schedule, including milestones, due dates, and amounts. This could be based on project phases or deliverables.
- Payment Methods: Include the accepted payment methods (e.g., bank transfer, PayPal) and any relevant details like account numbers.
- Confidentiality and Non-Disclosure
- Confidential Information: Define what constitutes confidential information and how it should be handled. This ensures that sensitive information is protected.
- Non-Disclosure Agreement (NDA): Include an NDA clause to prevent the sharing of confidential information with third parties.
- Intellectual Property Rights
- Ownership: Clearly state who owns the intellectual property created during the project. This includes content, designs, code, and other deliverables.
- Usage Rights: Define how the deliverables can be used by each party. This could include licensing terms, usage restrictions, and any royalties.
- Termination Clause
- Termination Conditions: Specify the conditions under which the contract can be terminated by either party. This includes breach of contract, non-payment, or failure to deliver.
- Notice Period: Define the notice period required for termination. This gives both parties time to address any issues before ending the contract.
- Dispute Resolution
- Mediation and Arbitration: Include a clause for resolving disputes through mediation or arbitration before taking legal action. This can save time and costs.
- Jurisdiction: Specify the legal jurisdiction that governs the contract. This is important for determining where any legal proceedings will take place.
- Signatures
- Authorized Signatories: Ensure that the contract is signed by authorized representatives of each party. This makes the contract legally binding.
Establish Quality Assurance Processes
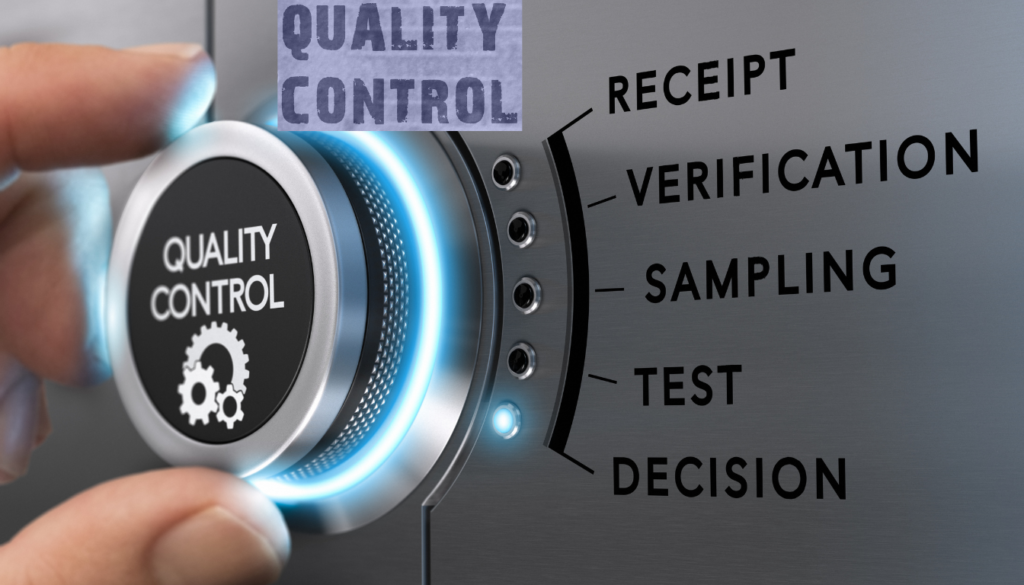
Establishing quality assurance (QA) processes ensures that your website meets the highest standards of functionality, usability, and performance. Here’s a detailed guide:
- Define Quality Standards
- Accessibility: Use tools like WAVE to identify and fix accessibility issues such as contrast errors, skipped heading levels, and redundant links. Manually test the site to ensure it is navigable and readable for all users.
- Usability: Ensure that the website is user-friendly. Navigate the site as a new visitor to check for distractions, readability, and ease of use.
- Implement Testing Procedures
- Automated Testing: Use automated tools to test for code errors, broken links, and performance issues. This can include tools like Google Lighthouse for performance audits.
- Manual Testing: Perform manual tests to evaluate the user experience. This includes checking navigation, form functionality, and overall usability.
- Set Up a Staging Environment
- Staging Site: Create a staging environment to test updates and changes before deploying them to the live site. This helps in identifying issues without affecting the user experience.
- Testing Plugins: Use plugins like WP Staging to create a clone of your site for testing purposes.
- Continuous Monitoring
- Regular Audits: Schedule regular audits to check for new issues and ensure ongoing compliance with quality standards. This includes accessibility audits, performance checks, and security scans.
- Monitoring Tools: Use monitoring tools to track website uptime, load times, and user behavior. Tools like Google Analytics and Pingdom can provide valuable insights.
- Feedback and Improvement
- User Feedback: Collect feedback from users to identify areas for improvement. This can be done through surveys, feedback forms, or direct user testing sessions.
- Iterative Improvements: Use the feedback and test results to make continuous improvements. Implement changes and re-test to ensure issues are resolved.
- Documentation and Training
- Document Processes: Keep detailed documentation of your QA processes, including testing procedures, tools used, and common issues. This ensures consistency and helps onboard new team members.
- Team Training: Train your team on QA best practices and tools. Regular training sessions can help keep everyone updated on the latest standards and techniques.
Plan for Ongoing Maintenance
Ongoing maintenance is crucial for keeping your WordPress website secure, up-to-date, and running smoothly. Here’s a detailed guide:
- Regular Updates
- Core Updates: Ensure that your WordPress core is always updated to the latest version. This includes security patches and new features.
- Plugin and Theme Updates: Regularly update all plugins and themes to their latest versions to avoid vulnerabilities and compatibility issues.
- Security Measures
- Security Scans: Perform regular security scans to detect and fix vulnerabilities. Use plugins like Wordfence or Sucuri for comprehensive security checks.
- Backups: Schedule regular backups of your website. Store backups off-site and ensure they can be easily restored. Tools like UpdraftPlus can automate this process.
- Performance Optimization
- Speed Tests: Regularly test your website’s speed using tools like Google PageSpeed Insights or GTmetrix. Optimize images, leverage caching, and minimize code to improve load times.
- Database Optimization: Clean and optimize your database periodically to ensure it runs efficiently. Plugins like WP-Optimize can help automate this task.
- Content Management
- Content Updates: Regularly update your content to keep it relevant and accurate. This includes blog posts, product descriptions, and multimedia content.
- SEO Audits: Perform regular SEO audits to ensure your content is optimized for search engines. Use tools like Yoast SEO to identify and fix issues.
- User Experience
- Broken Links: Check for and fix broken links to improve user experience and SEO. Tools like Broken Link Checker can automate this process.
- Accessibility: Regularly test your site for accessibility issues to ensure it is usable by all visitors. Tools like WAVE can help identify problems.
- Monitoring and Analytics
- Uptime Monitoring: Use tools like Pingdom to monitor your website’s uptime and receive alerts if it goes down.
- Analytics: Regularly review website analytics to track performance, user behavior, and other key metrics. Google Analytics is a powerful tool for this purpose.
- Documentation and Training
- Maintenance Log: Keep a detailed log of all maintenance activities, including updates, backups, and changes made. This helps in tracking issues and ensuring accountability.
- Team Training: Train your team on maintenance best practices and tools. Regular training sessions can keep everyone updated on the latest techniques and standards.
Monitor and Adjust Plan Regularly
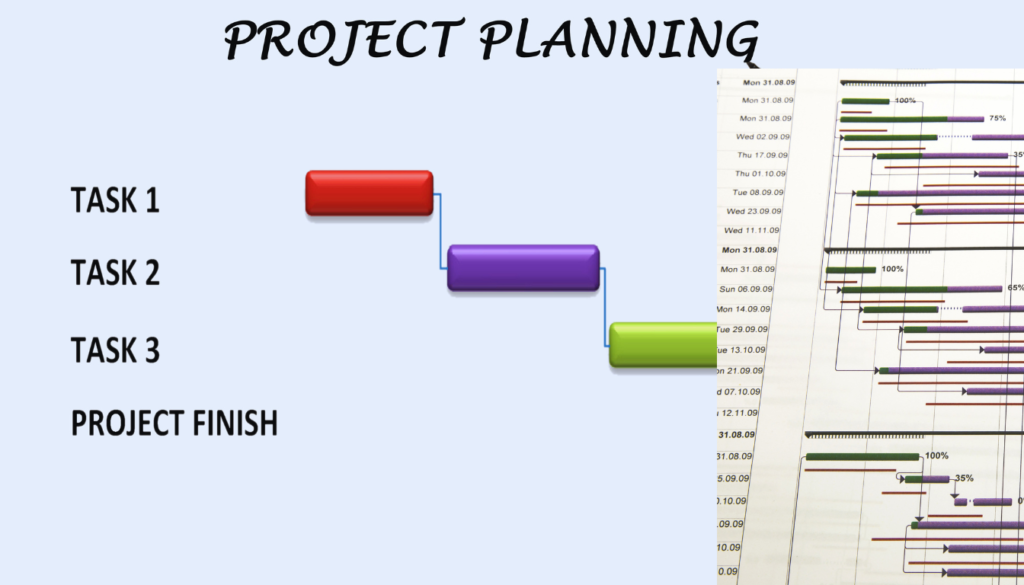
Regular monitoring and adjustments are essential to ensure your WordPress website remains efficient, secure, and user-friendly. Here’s a detailed guide:
- Regular Backups
- Backup Schedule: Establish a backup schedule based on the frequency of updates to your site. Daily backups are ideal for dynamic sites, while weekly or monthly backups may suffice for less active sites.
- Backup Solutions: Use reliable backup solutions like Jetpack, UpdraftPlus, or VaultPress. Ensure backups are stored off-site for added security.
- Performance Monitoring
- Uptime Monitoring: Use tools like Pingdom or UptimeRobot to monitor your website’s uptime. Set up alerts to be notified immediately if your site goes down.
- Speed Tests: Regularly test your website’s speed using tools like Google PageSpeed Insights or GTmetrix. Identify and address performance bottlenecks.
- Security Monitoring
- Security Scans: Conduct regular security scans to detect vulnerabilities and malware. Plugins like Wordfence or Sucuri can provide comprehensive security checks.
- Update Management: Ensure that WordPress core, themes, and plugins are always up-to-date to prevent security risks.
- Content and SEO Audits
- Content Updates: Periodically review and update your content to keep it relevant and accurate. This includes blog posts, product descriptions, and multimedia content.
- SEO Audits: Perform regular SEO audits using tools like Yoast SEO or SEMrush. Adjust your SEO strategy based on the latest best practices and algorithm changes.
- User Experience Monitoring
- Broken Links: Regularly check for and fix broken links using tools like Broken Link Checker. This improves user experience and SEO.
- Accessibility Checks: Test your site for accessibility issues to ensure it is usable by all visitors. Tools like WAVE can help identify problems.
- Analytics and Feedback
- Website Analytics: Use Google Analytics to track website performance, user behavior, and other key metrics. Regularly review this data to identify areas for improvement.
- User Feedback: Collect feedback from users through surveys, feedback forms, or direct user testing sessions. Use this feedback to make informed adjustments.
- Documentation and Training
- Maintenance Log: Keep a detailed log of all maintenance activities, including updates, backups, and changes made. This helps in tracking issues and ensuring accountability.
- Team Training: Train your team on monitoring tools and best practices. Regular training sessions can help keep everyone updated on the latest techniques and standards.
Conclusion and Final Thoughts
Starting a new project can be both exciting and challenging. By following a comprehensive startup checklist, you can ensure that all critical aspects are covered including the glossary of terms, setting your project up for success.
Points To Note:
- Define Your Scope: Clearly outline your project’s goals, features, and requirements. Use inspiration from other successful websites to refine your vision.
- Create a Job Post: When hiring developers or other professionals, provide detailed job posts that include your specific needs and expectations.
- Plan for Ongoing Maintenance: Choose a developer or service that offers regular updates, security scans, and other maintenance tasks to keep your project running smoothly.
By meticulously planning and executing each step of your project startup, you can avoid common pitfalls and ensure a smooth launch. Regular reviews and adjustments will help keep your project aligned with its goals and responsive to any changes or challenges that arise.
Remember, a well-planned project not only meets its objectives but also provides a solid foundation for future growth and improvements. Stay organized, communicate clearly with your team, and remain flexible to adapt as needed.
FAQ On Project Start Up
What is the first step in creating a project start-up checklist?
The first step is to clearly define the project’s scope, including its goals, features, and requirements. This helps set clear expectations and guides the overall project planning.
How do I determine the features to include in my project?
Look at similar successful projects and websites for inspiration. Make a list of essential features and functionalities that align with your project goals and user needs.
Should I plan for ongoing maintenance from the start?
Yes, planning for ongoing maintenance is crucial. Regular updates, security scans, and backups help keep the project running smoothly and securely over time.
How often should I review and adjust my project plan?
Regular reviews should be conducted, especially after major milestones or changes. This helps in making necessary adjustments to stay aligned with project goals and responding to any challenges.
What tools can help with project management and monitoring?
Tools like Trello, Asana, or Jira can help manage tasks and monitor progress. Additionally, using analytics tools like Google Analytics can provide insights into project performance.
How can I ensure my project stays on budget?
Create a detailed budget plan and track expenses regularly. Use project management tools to monitor spending and make adjustments as


